Check Register for Libre Office

If you are using Libre Office and looking for a good check register (which can easily be used for a credit card account, too), I found one here: Personal Checkbook Register [Update 1/2/2025: Use the templates found at that link or go to https://extensions.libreoffice.org/en/extensions/ or just https://extensions.libreoffice.org There are some sites that are riddled with ads (including deceptive download ads) that include LibreOffice in the address like libreofficetemplates.net — I’d avoid that one].

On that page, there is a link to Download the template. After opening the downloaded template, you can start using it, save it and title it, or copy it over to another new or existing spreadsheet file. (This bit assumes you already have Libre Office downloaded. If not, do that first here).

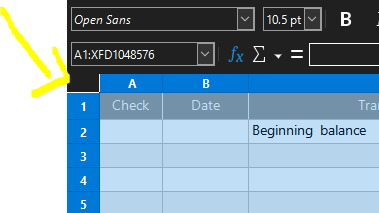
I copied the downloaded template over to use within a workbook I already had. To copy the template along with all the formatting and formulas, just click the upper left corner of the spreadsheet to select the whole thing, Ctrl+C (on Windows) to copy, then select the same upper left corner of the spreadsheet where you want to use the template and this time enter Ctrl+V to paste it in.

For use with credit card accounts, I delete the first column labeled “Check” and change the “Payment” column to “Charges” and the “Deposit” column title to “Payments”. You can easily customize this register to your preferred design and function, such as the colors, fonts, or adding a column for noting categories. Go wild! But, not too wild. This is a spreadsheet after all.


Related or Cited Resources:

Printers and Linux Mint

After upgrading to the recent Linux Mint “Victoria” version 21.2, I was unable to print. I use an EPSON ecotank printer (Epson ET-4850) and in the prior version called “Vera” 21.1 the printer was recognized without me doing anything to install it. After upgrading, my printer wasn’t recognized and going through the steps of Start Menu –> Administration –> Printers –> Add –> Find Network Printer, etc. didn’t work. The Epson printer did show in the list on a few different lines after choosing “Find Network Printer” but after hitting “Forward” to finish the process, I kept getting a CUPS server error, no matter which choice I selected.

I found a solution in the Linux Mint forums that got me printing again. After finding my printer’s IP address, I was able to use the following suggested script. To use the script, make up your own printer name where you read PRINTER_NAME and enter the printer’s IP address where I’ve noted X’s:

lpadmin -p PRINTER_NAME -v "ipp://XXX.XXX.X.XX/ipp/print" -E -m everywhere

Yesterday, I ran a search on something like “printer not working after upgrading to Linux Mint Victoria” and then another more general search like “problems adding printer to Linux Mint”. It was getting late, and the search results yielded a lot of older articles that didn’t help me. Today, I just used a more general search of “how to add a network printer to linux mint” and after viewing a video result that didn’t help, one result a little way down on the results page caught my eye, and the solution ended up being successful.

Let me know of what you’ve found helpful with dealing with printer problems using Linux and I may add the solution to this article in order to help others with a similar problem.


Related or Cited Resources:

  • Linux Mint Forums: https://forums.linuxmint.com/viewtopic.php?t=377973

Recover Chrome Bookmark

While editing my Chrome browser bookmarks that I save in the Bookmarks bar area, I accidentally deleted a folder that had several bookmarked websites inside of it. That bookmarks bar area along the top of an open Chrome browser page sees a lot of use by me and I frequently edit what is there.

Well, I deleted an entire folder while trying to delete just one item within the folder. Thankfully I found a way to recover my deleted bookmark in Chrome. You use the undo shortcut keyboard command (Ctrl + Z on a Windows systems) from within the Bookmark Manager. I was able to repeat the process with Brave browser as well!

The steps for accessing the Bookmark Manager are pretty easy:

  • Go to the three dot menu in the upper corner of your browser
  • Choose “Bookmarks” from the menu that opens
  • Then, choose “Bookmark Manager” from the next menu that opens
  • Once inside the bookmark manger, hit Ctrl + Z to undo your deletion. You should see your deleted bookmark or deleted folder. That’s it! If you don’t see your item(s), open the folders in your bookmark manager where it may be and try Ctrl+Z again. I had to do it a couple times to get my deleted folder to reappear.

By the way, if you are used to saving only individual websites as bookmarks, you might find organization better by using folders as I do. You may collect several individual sites into a folder to save as a bookmark, rather than only adding one page to the Bookmarks bar or Other Bookmarks folders. Just right-click an empty area of the bookmarks bar and choose “add folder”. Give the folder a name and then going forward you may drop links inside the folder to keep similar items together. When you bookmark a site after creating your own folders, you’ll see the folder names in addition to the options of “Bookmarks bar” and “Other bookmarks”.

editing bookmark drop down folder menu
Adding a bookmarked site to a folder you’ve created

Related or Cited Resources: